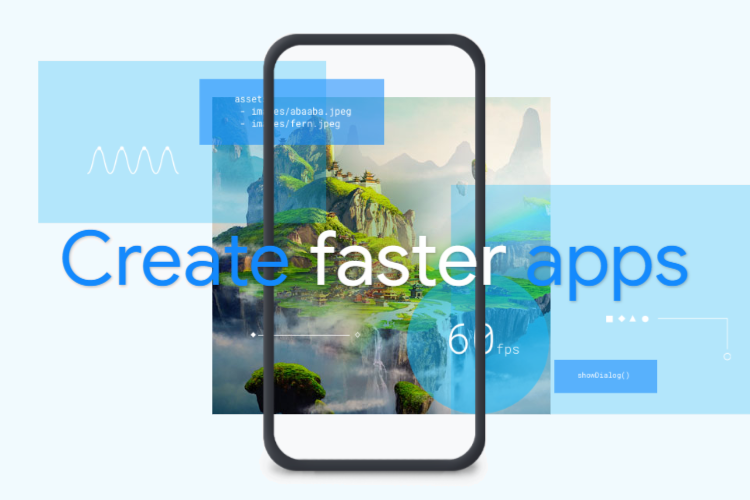
Flutter is a renowned name in the tech realm; the framework provides developers with ease in building beautiful, cross-platform apps from a single codebase. With its fast development cycle, rich widget library, and expressive UI, Flutter is a strong choice for mobile app development. Studies show that nearly 46% mobile app developers use Flutter around the world.
However, no matter how powerful Flutter is, performance challenges can emerge when your application is large in size and more complex for users. At the time of browning, if the app is performing slow, users will quickly leave and start looking for other options. Unresponsive UI, poor animation, and delayed loading speed are among the most common signs that your Flutter app requires performance tuning. These issues might seem small, but they can lead to lower retention rates and higher bounce rates.
But it doesn’t mean it will remain the same. Flutter offers the best tools and practices that can easily identify and fix performance. Whether you’re optimizing an existing app or preparing for launch, a flawless and responsive app can change the whole story. Let’s help you with the most effective ways to improve your Flutter app performance, reduce lag, and deliver a seamless user experience.
Common Flutter App Performance Performance Pitfalls
Many times, Flutter developers encounter performance pitfalls, which results in slow down apps and annoying users if not addressed. Let’s give a close eye on them:
Unnecessary Widget Rebuilds
Flutter enables developers to rebuild widgets when their state changes, but if they build too many widgets unnecessarily, it can slow down the Flutter app performance. This happens when Flutter developers apply setState to a high-level widget.
Also, when they don’t use const constructors. This means Flutter is not able to optimize and ends up rebuilding unnecessarily widgets. By keeping rebuild focused and minimal, developers can keep the app scalable and responsive.
Heavy Logic Inside the build
In Flutter, the UI depends on the build method, which can be called many times per second to show even small changes to the UI. Maintaining its small weight is therefore absolutely vital. It slows down the interface when developers do heavy tasks like API calls, complicated calculations, or data processing inside build. Flutter has to wait for those tasks to finish before it can render anything.
This makes apps run slowly and not respond quickly, which is bad for the user. It is also expensive, as nearly nine out of ten users abandon apps that provide an unsatisfactory experience. It is better to give hard work to initState, asynchronous functions, or specialized controllers. When build only provides, your app stays quick, efficient, and easy to use, which is exactly what people want these days.
Blocking the Main Thread with Heavy Tasks
In Flutter there is one main thread that handles the user interface (UI). This thread is known by the name of the “UI thread.” The UI thread is responsible for a number of tasks, including the rendering of imagery and the response to user actions. If you do things that use a lot of the CPU power, the app may run slowly, freeze, or stutter.
These delays are clearly noticeable on devices. So, it’s best to handle heavy tasks offline with Future or move them to background groups. This makes sure that the main thread stays on task with displaying and keeping the interface responsive.
Improper Image Handling
Images play a crucial role especially when it comes to see how your Flutter app looks and feels. But if you don’t handle them properly, they can slow down your app’s performance. It takes a lot of time to process when you load large images because they use more memory. If you don’t keep pictures, your app will download the same files again and again, which wastes time and data.
Also, it makes lags that can be seen, especially on slower lines. And when there is no placeholder during the loading process, users are left watching the empty spaces, which can hinder the overall experience. So, it’s crucial to use caching tools and show placeholders while images load to keep things running smoothly.
Deeply Nested Widget Trees
When you put together small, reused parts in Flutter’s widget-based design, it’s easy to make complex user interfaces. Unfortunately, the efficacy of your widget may be adversely affected as it becomes increasingly nested and complex. A structure with a lot of levels makes it harder for Flutter to do its job during layout and painting, which can slow down rendering.
This also complicates the process of following and maintaining your code over time. To avoid this, it’s best to keep the structure of the widgets as simple as possible. For example, split large widgets into smaller, more focused parts, and use layout widgets in a smart way. This improves Flutter app performance as well as makes scaling and management of your codebase simpler.
Also Read – Flutter Framework: Pros and Cons for App Development
Way to Improve Your Flutter App Performance
To improve Flutter app performance, you need to use smart coding, make smart design choices, and handle resources efficiently. Here are some practical strategies to speed up, responsiveness, and efficiency your Flutter app:
Use the Flutter DevTools
When you’re making small changes to improve speed, Flutter DevTools gives you a clear view of how your app works. It’s a full suite of tools meant to help you find problems before they affect your users, not just a set of reports. The timeline helps you find the source of messed up or dropped frames, and the widget inspector lets you look at your UI tree in real time.
Keep an eye on how much memory is being used to find memory leaks early and find widgets that need to be rebuilt more often than they should. DevTools can help you avoid performance problems and keep your app going smoothly by becoming a regular part of your work, especially while it’s being developed and after big changes.
Avoid Unnecessary Widget Rebuilds
Flutter’s dynamic UI system is slow to respond when too many widgets are rebuilt. This generally happens when setState is used too broadly, updating a lot of the UI when only a small part needs it. Flutter can’t optimize widgets when you skip const constructors, which causes needless redraws.
This increased processing causes lost frames and a less smooth experience. Studies show that more than 70% of users abandon the app due to bad performance, so when an app feels slow, it matters.
Use your rebuild reasoning to stop this from happening. Use the shouldRebuild method in custom interfaces or implement structured state management tools such as Bloc or Riverpod. Even as the application grows, the UI stays smoother and more responsive the more exact your modifications are.
Leverage Lazy Loading
If you try to load too many things at once, especially large files with lots of media, your app might get overloaded and make it slower for people to use. That’s why the loading speed needs to be slow. Within Flutter, you do not need to create the whole user interface all at once. To only show what’s on the screen, you can use builders like ListView.builder, GridView.builder, or PageView.builder.
This makes scrolling easy and simple. A slow load and loop or endless scroll can help you get data from an API in smaller, easier-to-handle chunks. By including loading indicators or skeleton screens, users can maintain their interest while waiting for new content to be downloaded. This is a great way to create feeds, markets, and other apps where information is always being added.
Minimize Overdraw and Repaints
When Flutter draws the same pixel more than once, it gives the GPU more work to do. This is called overdraw. This common issue happens when UI elements are stacked on top of each other, especially when BackdropFilter, shadows, or transparency are used. These small details can make your design better, but too many of them can slow things down.
You can use the Performance Overlay or run your app in profile mode to see real-time overdraw to find trouble spots. It’s easier to use RepaintBoundary to separate basic UI components once they’ve been found. You can also avoid using Opacity or ClipRect when they’re not needed. Reducing the work needed to repaint not only improves speed, but it also gives your app a polished, snappy look that users like.
Optimize Network Calls
If network calls are slow or come in too often, they can quickly become a bottleneck, leaving users frustrated with delays. It’s better to get information in smaller chunks or only when it’s needed than to load it all at once. When you use packages like dio_cache_interceptor or hive to store data locally, you can avoid making multiple API calls for the same content.
When making your UI, you should be careful to use tools like FutureBuilder and StreamBuilder so that you don’t have to rebuild things over and over again because of network responses. Always make sure you have the right warning messages or fallbacks ready for when you’re not online. If you follow these steps, your app will always be fast and effective, even if the network is down.
Use Efficient Images
Slow apps that use a lot of memory often have large images that are not compressed. It’s important to resize and compress pictures before adding them to your app so that your UI stays responsive. File formats like WebP and JPEG are a good mix between clarity and size, which saves significant amounts of data.
When rapidly loading images, especially from the network, tools like cached_network_image are helpful because they store images locally so they don’t have to be downloaded over and over again. To make your app look more fulfilled and professional, add placeholders or shimmer effects while it’s loading. Using image.memory and resizing can help you get the most out of your memory and render faster when you’re working with raw picture bytes.
Reduce App Size
For your users, a streamlined application not only installs more quickly but also launches more quickly and consumes less memory, resulting in a more seamless experience. Starting by checking your project to get rid of any packages, fonts, or image files that aren’t being used and are making your build too big.
To make APKs smaller, Flutter’s –split-per-abi build option makes separate files for each target platform. This way, users only download the binaries they need. On Android, you can get rid of even more useless code by using code shrinking tools like ProGuard or R8.
For iOS, the app size is reduced by excluding bitcode when it is not necessary. You could also utilize lazy loading to selectively load files during runtime. Beyond performance, smaller apps are more likely to be downloaded and keep users interested for longer periods of time.
Profile and Optimize Build Methods
If you want to keep the build method as light as possible, you should run it every time Flutter needs to change the UI. It’s not fun to use build () for heavy tasks like data filtering, answer parsing, or string processing because it makes the UI feel slow. For better results, move these positions to lifecycle hooks like initState or use FutureBuilder or dedicated state controllers to handle them asynchronously.
You can use Flutter DevTools to find the build methods that take longer than they should. This will help you figure out how to speed them up. Your users will clearly enjoy a smoother experience when you streamline your build functions. This is because it speeds up rendering.
Take Advantage of Isolates
The user interface of your Flutter app runs on a single main thread. This means that any CPU-intensive jobs, such as encrypting, parsing, or processing large amounts of data, can block that thread and make the app perform slowly. This can be avoided by using isolates, which let you do these heavy tasks in the background without stopping the display.
Although Flutter’s compute function is a quick way to hand off simple jobs, custom isolates give you more control in more complicated situations. You can keep your app smooth and fast even when it’s doing a lot of work by moving the heavy work off of the main thread.
Test on Real Devices
You might get the wrong idea about how well your app works if you only use emulators or simulations. There are big differences between real devices in terms of their processing speed, memory, screen sizes, and network conditions. Testing across various mobile app environments helps uncover issues that don’t appear in emulators or controlled settings. If you want to get a better idea of how your app works for real users, you should also describe it in release mode. Also, trying your app when the network is slow and memory is being used up makes sure that it stays stable and responsive for everyone, not just people with the newest phones.
Also Read – Why Flutter is Best for Mobile App Development
Wrapping Up
Boosting Flutter app performance isn’t about applying a single fix, it’s the result of many thoughtful decisions made throughout development. Every step contributes to a smoother, faster app, from minimizing unnecessary rebuilds to optimizing assets and using tools like Flutter DevTools.
When animations run fluidly, screens load quickly, and interactions feel responsive, users are likelier to stick around. A well-optimized app doesn’t just perform better, it builds trust. So, as your app evolves, keep reviewing your code, measuring performance, and refining wherever needed. These small, consistent efforts pay off in long-term user satisfaction.