Gluten Free Pizza Crust starts with simple ingredients and a smart method that anyone can master at home. I wrote this guide for new bakers who want a crisp edge, a chewy bite, and a base that holds toppings without turning soggy. You will find friendly steps, pro tips, and easy fixes for common issues. By the end, you will bake a crust that makes you proud.
Why this crust works
Most beginner recipes focus on taste but skip structure. This version balances both. Rice flour keeps the crumb light. Tapioca starch adds stretch. A touch of psyllium husk or xanthan gum brings the dough together and traps gas during rise. Olive oil boosts tenderness. Sugar feeds the yeast fast, so you get lift and browning. The result is a crust that slices clean and stays sturdy under sauce.
Ingredients
Dry mix
- 1 cup white rice flour
- 1 cup tapioca starch
- 1 cup sorghum flour or oat flour
- 1 tablespoon psyllium husk powder or 2 teaspoons xanthan gum
- 2 teaspoons instant yeast
- 1 teaspoon fine sea salt
- 1 teaspoon sugar
Wet mix
- 1 cup warm water, about bath temperature
- 1 large egg, room temperature, or 3 tablespoons aquafaba for vegan
- 2 tablespoons olive oil
- 1 teaspoon apple cider vinegar
Tools you will need
- Mixing bowl and whisk
- Sturdy spatula
- Parchment paper
- Sheet pan or pizza stone
- Measuring cups and spoons
- Plastic wrap or a clean towel
- A bit of extra oil for your hands
Step by step method
- Whisk the dry mix: Combine the flours, starch, binder, yeast, salt, and sugar. Whisk until the color looks even. This prevents gluey pockets and helps the rise.
- Stir the wet mix: Blend warm water, egg, oil, and vinegar in a separate bowl. The water should feel warm, not hot. Hot water can harm yeast.
- Make the dough: Pour wet into dry. Stir with a spatula until no dry spots remain. The dough will look like thick cake batter. That is right for gluten free dough.
- First rest: Cover the bowl and let it sit for 10 minutes. This short rest lets the binder hydrate. The dough will firm up and become easier to spread.
- Shape the base: Set a sheet of parchment on your pan. Oil your hands. Scoop the dough on the paper. Press it into a round about a quarter inch thick. Nudge the edge a bit taller for a nice rim. If it sticks, oil your fingers again.
- Par bake: Bake at 220 C for 8 to 10 minutes until the top looks dry and the bottom sets. This step locks in structure, so your crust does not go soggy under sauce.
- Top and finish: Add sauce, cheese, and your favorite toppings. Return the pizza to the oven for 8 to 12 minutes, until the cheese bubbles and the rim turns golden. If you own a stone, slide the parchment onto it for extra crunch.
Texture targets and quick fixes
- Crust too soft: Par bake longer. Add one extra tablespoon of oil to encourage browning. Keep toppings light and use well drained mozzarella.
- Crust cracks when shaping: Wet your hands and smooth the surface. Let the dough rest for five more minutes to hydrate the binder.
- Crust tastes bland: Add one extra half teaspoon of salt to the dry mix. Brush the rim with garlic oil right before the final bake.
- Gummy center: Roll thinner at the center and keep the rim tall. Par bake until the bottom shows light color before topping.
Pro tips for beginners
- Use a scale if you have one. Gluten free blends feel sensitive to small changes.
- Warm ingredients help the yeast wake up. Cold egg can slow the rise.
- Keep the dough covered during rests to prevent a dry skin.
- Preheat the oven for at least 20 minutes. A hot start gives better oven spring.
- For meal prep, par bake two crusts, cool them, and freeze with parchment between. Bake from frozen with toppings for a fast dinner.
Flavor upgrades you will love
- Herb crust: Mix one teaspoon dried oregano and a half teaspoon garlic powder into the dry mix.
- Whole grain vibe: Swap half the rice flour for buckwheat flour. The taste turns nutty and deep.
- Cheesy edge: Sprinkle grated parmesan around the rim in the last five minutes of baking. It crisps into a savory halo.
- Spice kick: Add a pinch of chili flakes to the sauce or brush the crust with chili oil before topping.
Serving ideas
Keep toppings balanced, not heavy. Here are beginner friendly combos.
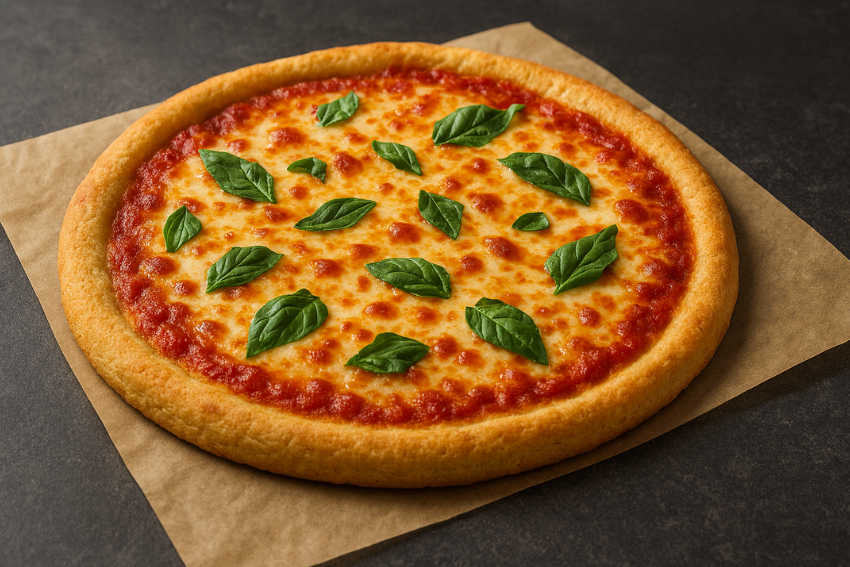
- Classic margherita with tomato, fresh mozzarella, and basil
- Pepper and onion with light sausage
- Mushroom and spinach with a swipe of pesto
- Paneer tikka style with yogurt based spice sauce and bell peppers
- Sweet corn and jalapeno with a drizzle of lime crema
Make it vegan or egg free
You can use aquafaba in place of egg. It keeps the crumb tender and helps browning. For cheese, pick a meltable vegan brand that you like. Brush the rim with olive oil to add shine and flavor.
Storage and reheating
Let leftovers cool on a rack. Store slices in a sealed box in the fridge for up to three days. Reheat on a hot pan or in an air fryer until the bottom turns crisp again. Avoid the microwave if you want crunch.
A short note on flour blends
Every gluten free flour blend behaves a bit different. If you use a store blend, check the label for starch and binder content. If it already includes xanthan gum, reduce or skip the binder in this recipe. Start with a small batch and adjust water by a tablespoon if needed. Your goal is a thick batter that spreads but does not pour.
Final thoughts
A great gluten free pizza crust depends on two things. The right blend and the par bake. When you get those two steps right, the rest feels simple. Trust the process. Keep notes. With each bake, you will learn how your oven and your flour behave. Soon you will slice a pie with a crisp rim, a tender crumb, and a flavor that keeps friends asking for the recipe.
Frequently asked questions
Can I make the dough ahead of time?
Yes. Mix the dough and let it rest as directed. Shape it on parchment, then cover and chill for up to 24 hours. Bring it to room temperature for 20 minutes before par baking.
Do I need a stand mixer?
No. A spatula works fine because there is no gluten to develop. Stir until smooth and you are done.
Can I bake this without yeast?
You can use one and a half teaspoons baking powder and a half teaspoon baking soda. The crust will taste more like flatbread and will not rise as much, but it stays tasty and quick.
Why do we add vinegar?
A small splash brightens flavor and supports lift, especially if you pair it with baking powder in a yeast free version.