Over a period of time, your system starts showing diminishing performance due to extensive usage. Here, you may start facing various performance issues like slow performance, crashes, freezes, and more. If you have started encountering these problems more often these days, then it’s time you should check your system health.
To do this Windows offers multiple monitoring tools using which you can check your PC’s health & performance. It will help you understand any possible problems & causes and helps you know how you can fix these problems.
In addition to that, you can also try third-party Windows diagnostic tools to check your computer’s health & performance. Let’s discuss how built-in utilities and features on Windows could help you check the health of your Windows 10 PC.
Use Windows Security Feature: The first built-in utility you can use to check and fix performance and health issues on Windows 10 is Windows Security. It helps you find & fix various health issues on your PC. To use this utility, follow these steps.
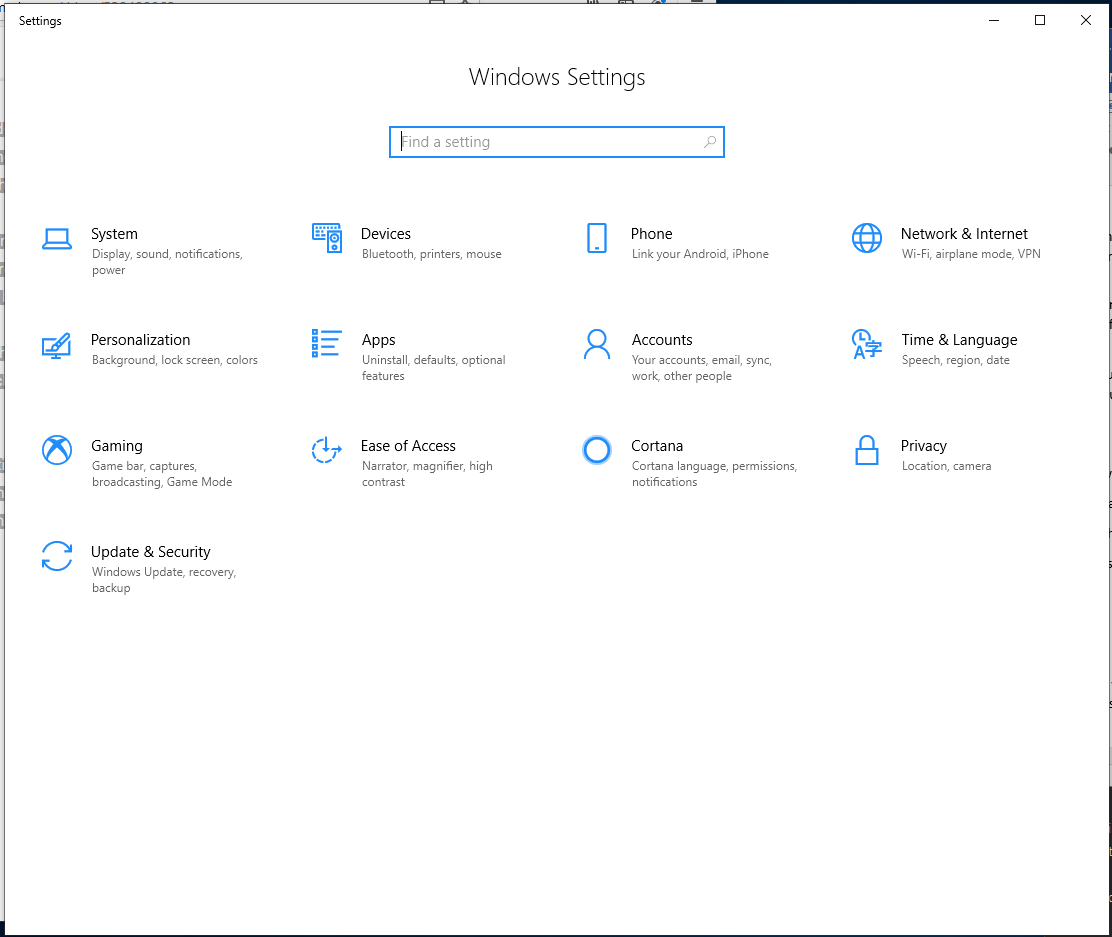
Right-click on Start menu icon and select Settings.
Here, you will find a Settings window is open. On this window, select Update & Security feature.
On the next window, select Windows Security from the left panel.
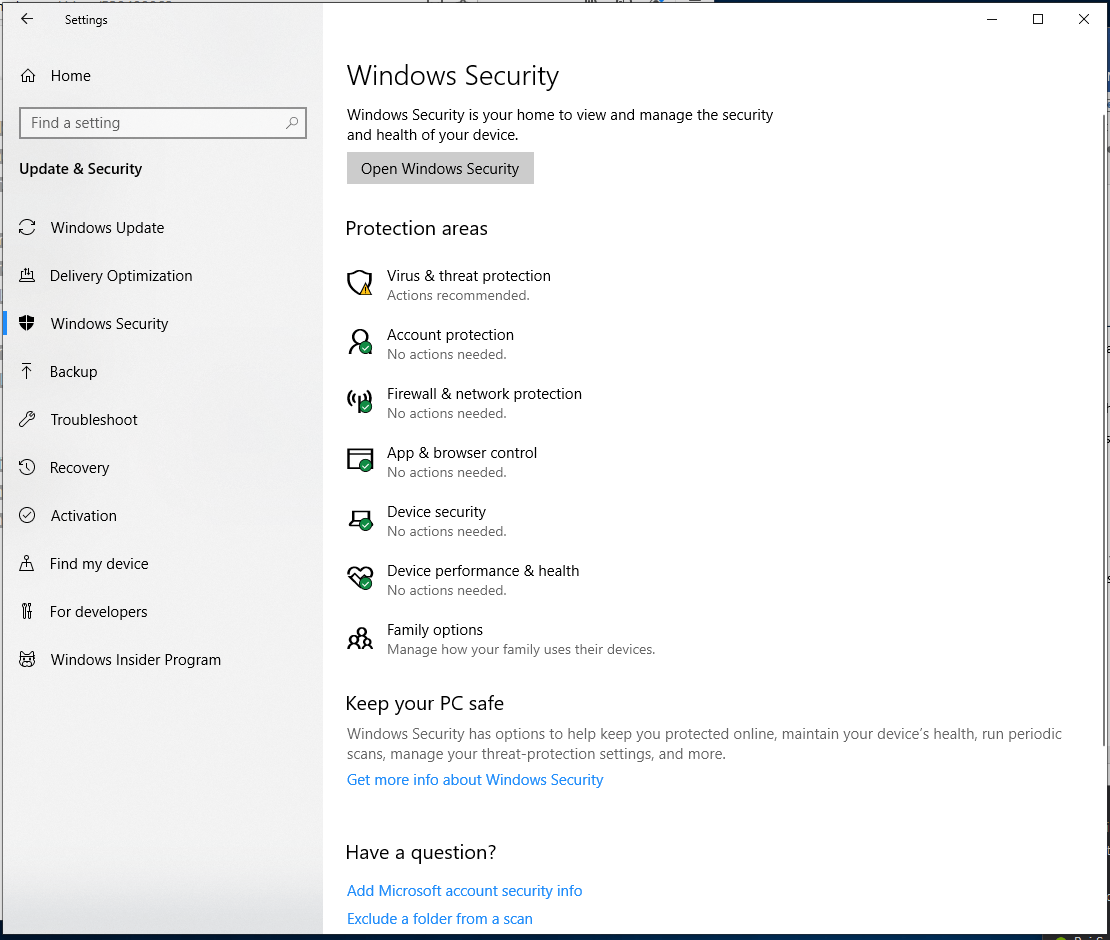
Now select Device Performance & Health option from the right panel.
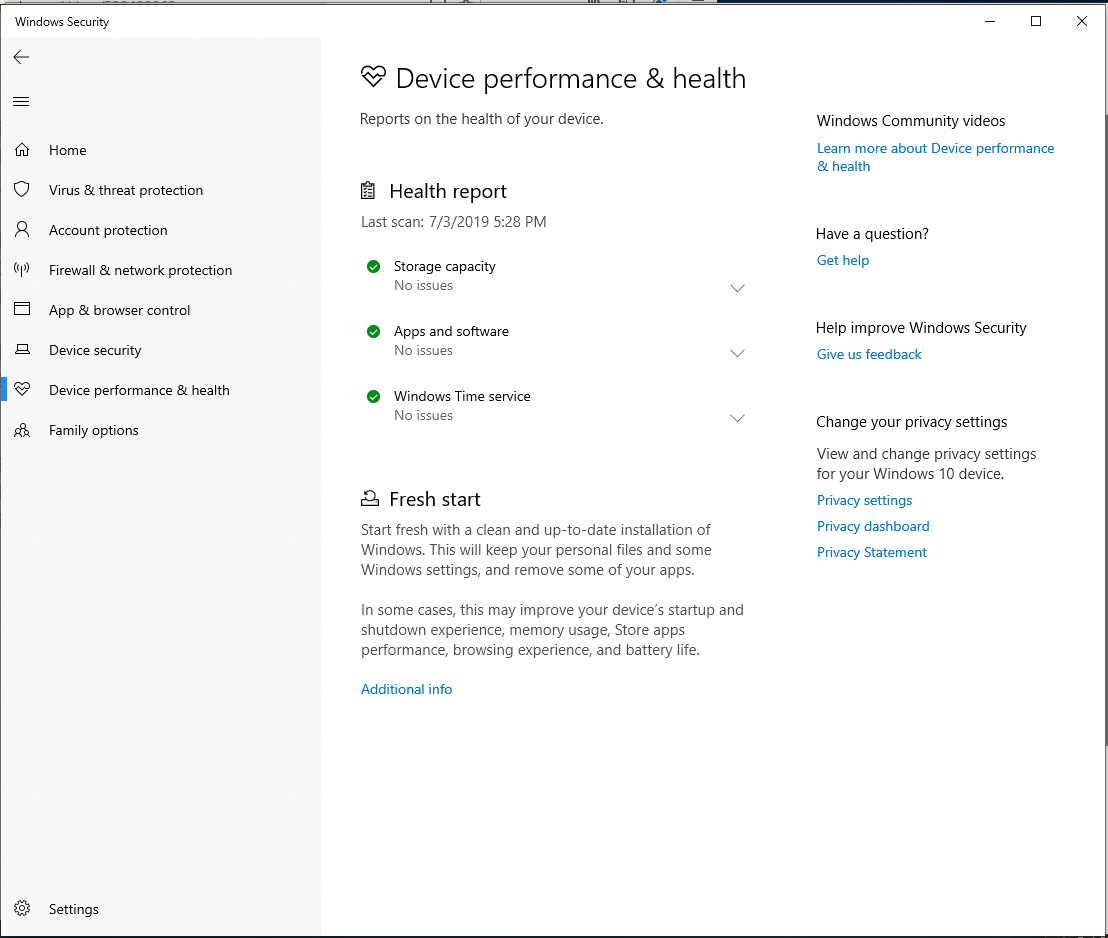
Here, it will display the health report of your PC. Here, it will show you 3 different health reports including:
- Storage Capacity
- Apps and software
- Windows Time service
If it finds issues with any of these services, then it will display you these issues and helps you fix them. In case everything is okay, then it will show No Issues under these options.
Try Administrative Tools: Next place you should check for health issues is under administrative tools. You can find this option under control panel. Here, it asks you to restart your system thus it’s better you should save all your open programs & files before following this feature. To use this option, follow these steps.
Go to Control Panel.
Select System and Security.
Tap on Administrative Tools.
Note: Alternatively, you can simply search & select “Administrative tools” from the search box on the taskbar.
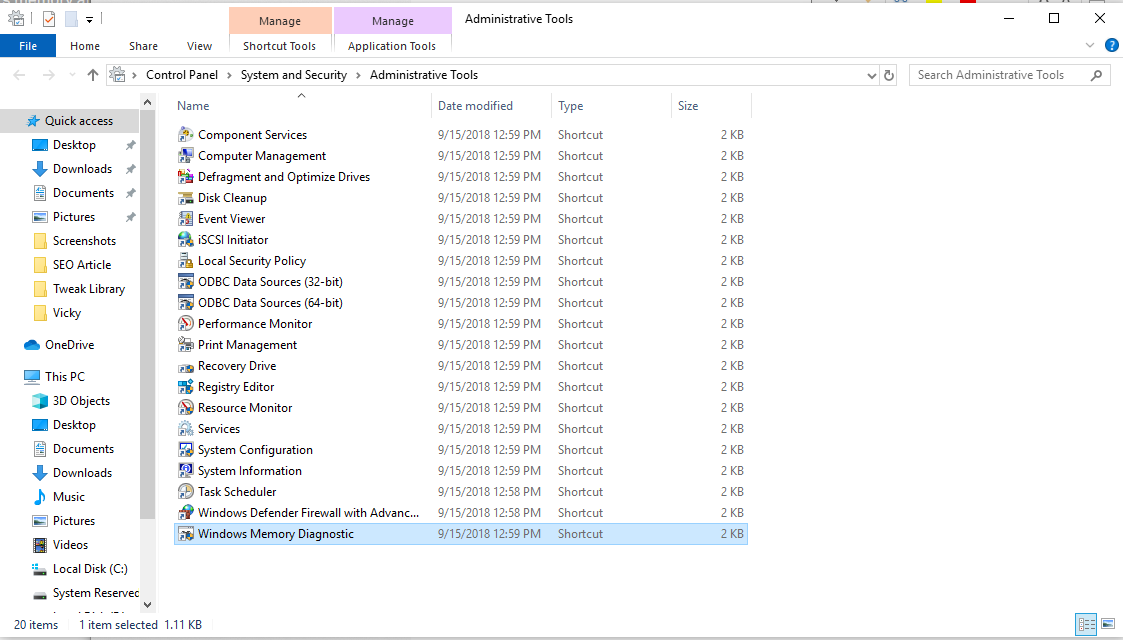
Once you are on the Administrative Tools window select “Windows Memory Diagnostic” option from the list.
Here a new window will pop-up. On this window, select “Restart now and check for problems (recommended)” option.
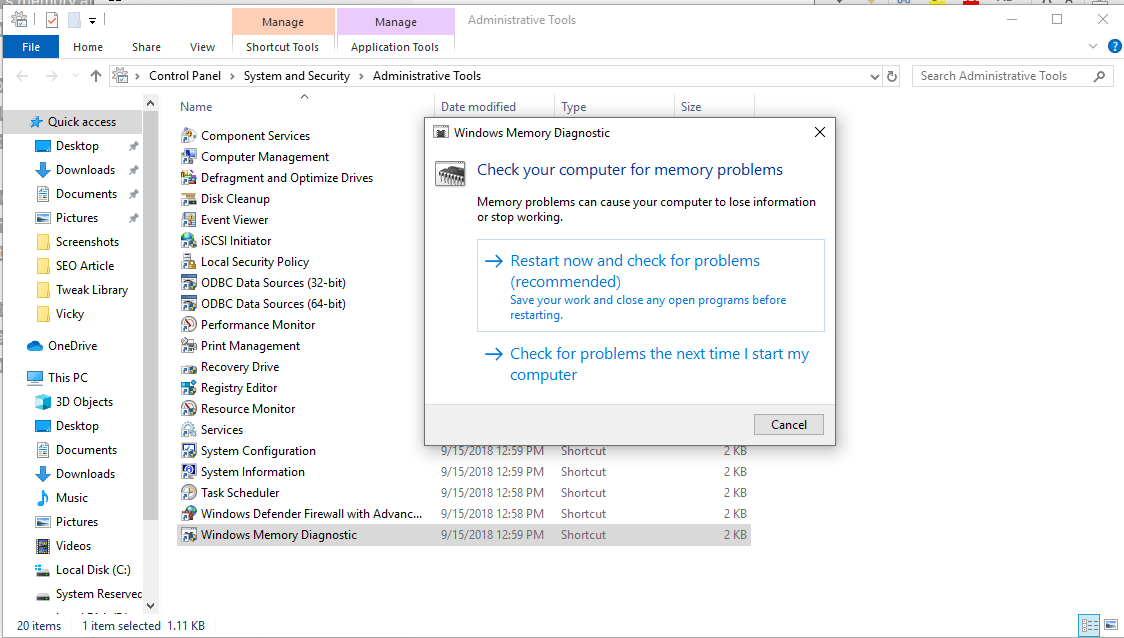
Note: If you can’t restart the PC now, then it also allows you to check for problems the next time you start your PC.
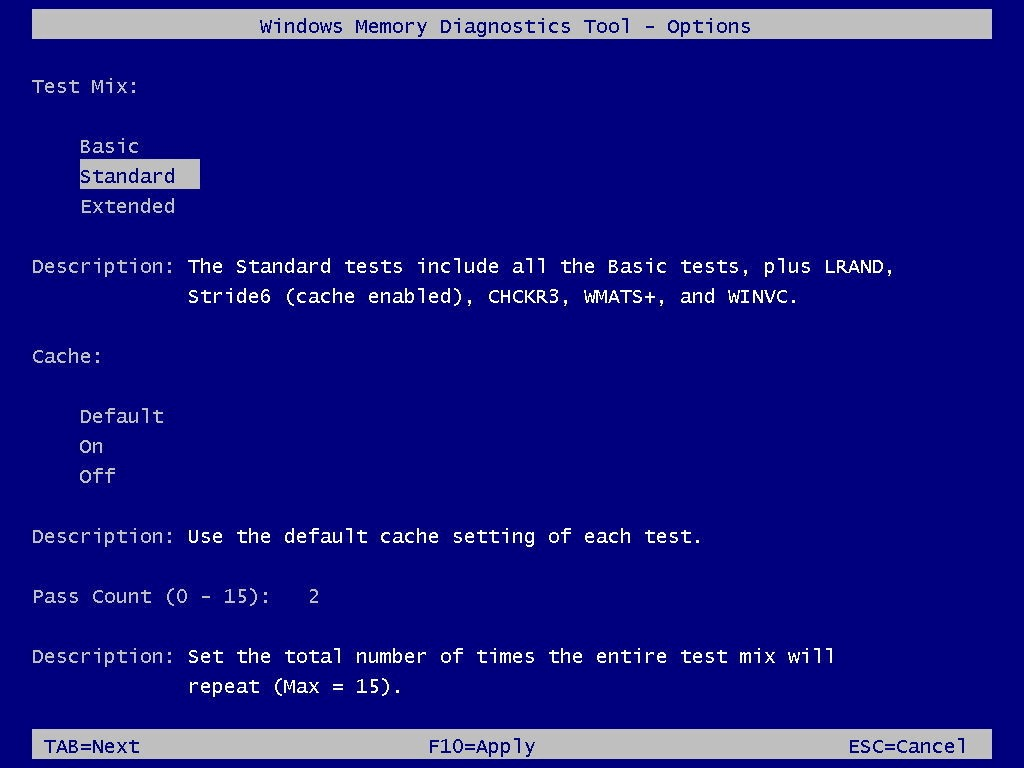
Once your system restarts, you will find it is open in Windows Memory Diagnostic environment. Here, all tests will start in Standard mode and help you run all scans that are available in Basic mode. Furthermore, it will also run WINVC, WMATS+, CHCKR3, Stride6, and LRAND tests successfully.
Now you can allow your system to run in Standard mode and test your PC’s memory. Alternatively, you can press F1 key that will help you open the Windows Memory Diagnostic page where you can make necessary tweaks in scan options. On the scan options page, you can select a Basic mode or Extended mode as per your needs. Here, you can also try to change cache settings if needed.
Source: windowscentral
In addition to that, it also allows you to set a number of times you want the scan to be repeated to test your PC’s memory modules. Once you are done making changes in options, simply press F10 key to go back to the main page. Here, you will find scan is restarted automatically.
Check the test results: To check the test results, follow these steps:
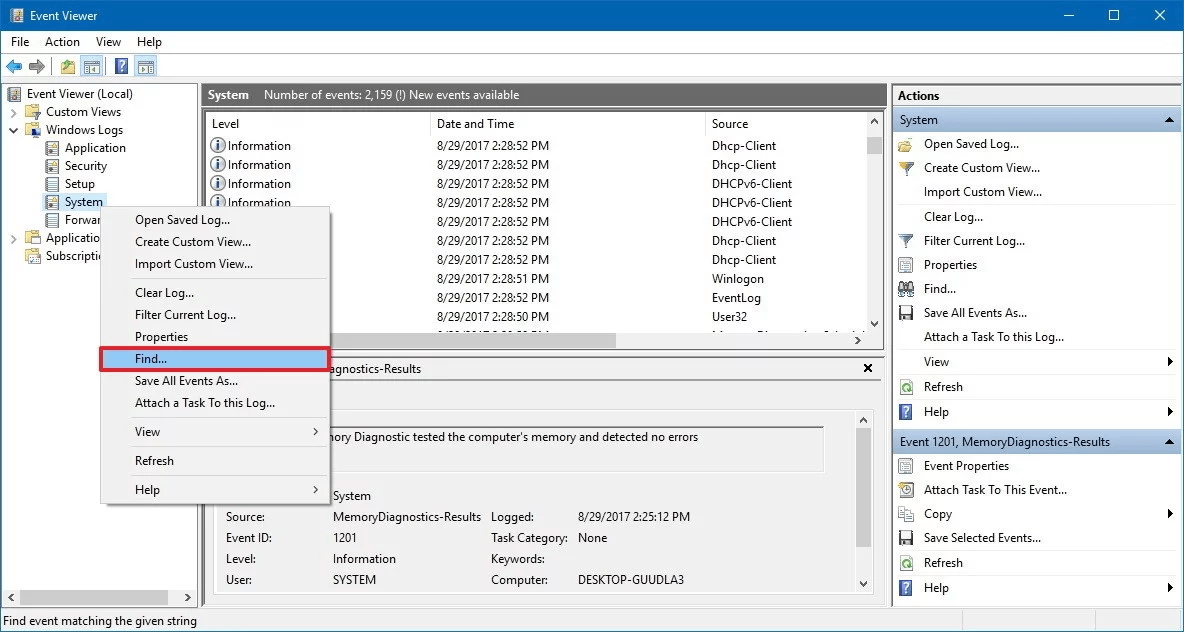
Search eventvwr.exe in the search box on the taskbar and press Enter.
It will open an Event Viewer. Here, expand Windows Logs folder.
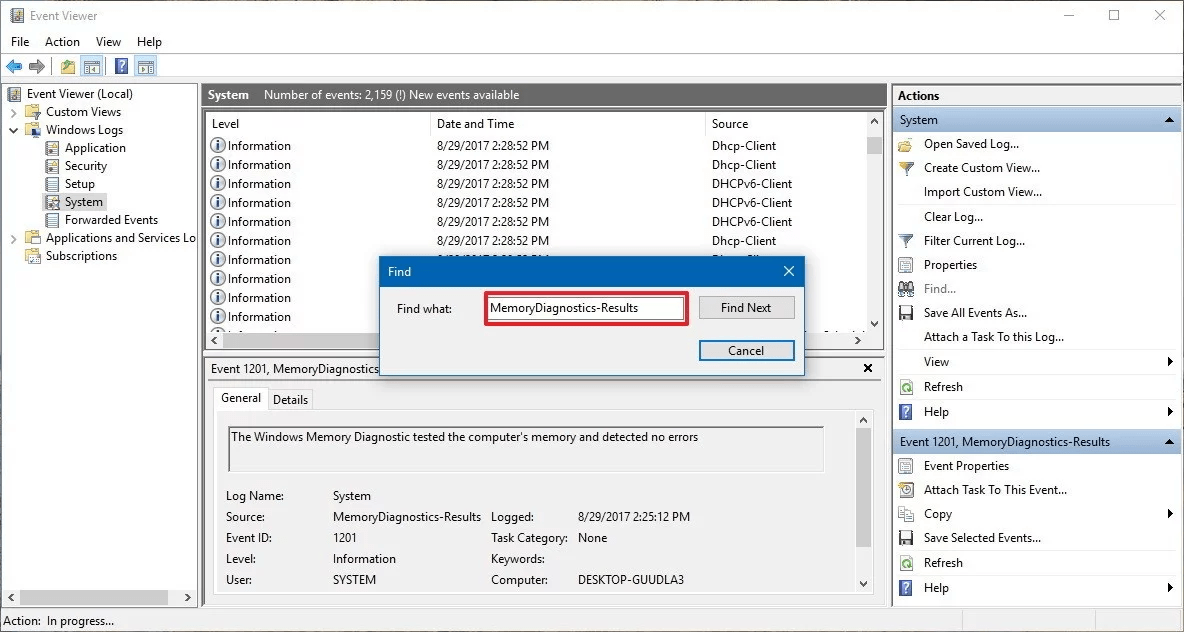
Now right-click on the System option and tap on Find.
Source: windowscentral
Now type MemoryDiagnostics-Results and press Find Next button.
Source: windowscentral
Close the Find dialog.
Now you will be on Event Viewer window.
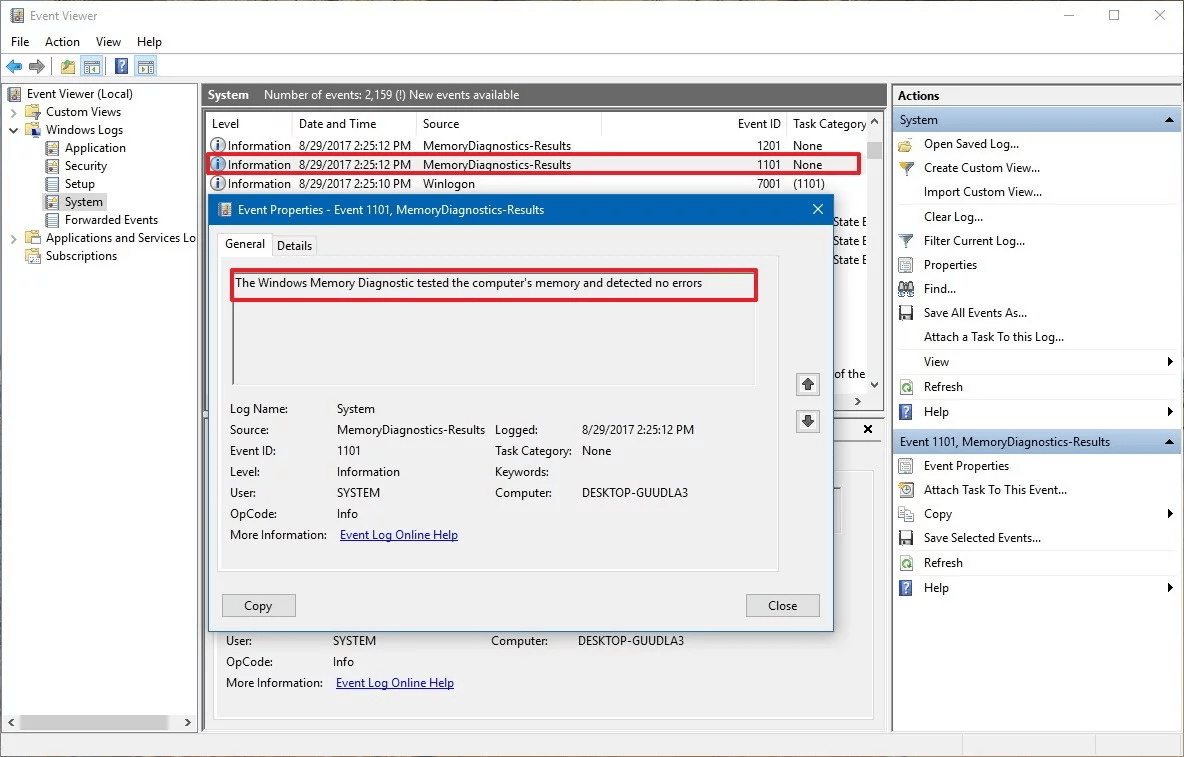
Here, double-click on “MemoryDiagnostics-Results” source and view the message.
If it displays a message that reads “The Windows Memory Diagnostic tested the computer’s memory and detected no errors” then you can consider memory isn’t the root of the problem.
Source: windowscentral
If it displays an error, then try to run the extended memory test and fix the problem. If it still displays error, then RAM modules could be the problem that needs to be replaced.
So, this was a quick review on how you can check the health of your Windows 10 PC. If you know more such ways, then feel free to comment in the section below.

