Buying the best offset smoker from the market is good enough, but making one at home is different. Everyone can buy an offset smoker, but a true lover has the spirit to build it. Most people think about how to make an offset smoker at home. Building an offset smoker is easier than we think. If you want to make your own smoker, stay with us till the end.
Offset smoker: A brief introduction
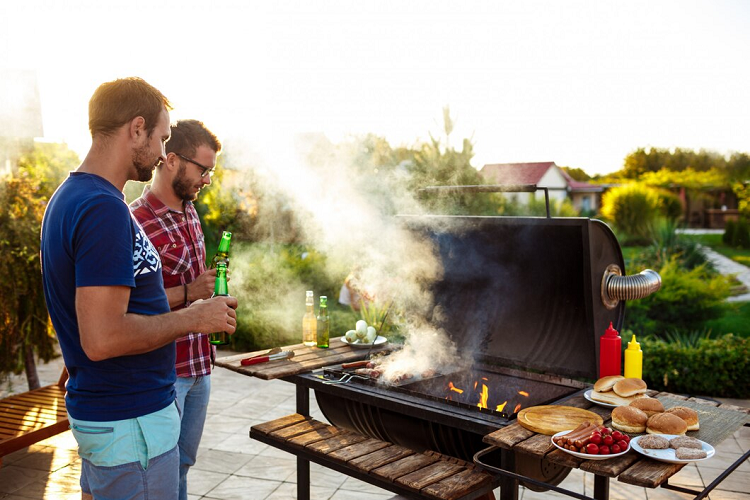
An offset smoker is the source of traditional smoked meat. It has three main parts. You will find a firebox, a cooking compartment, and a smoker’s frame. These are the basic parts of an offset smoker. There is a chimney at the side of the chambers.
Things you will need to make a DIY offset smoker
- Grinder: This will help you to cut large barrels.
- Weldor: You can use a weldor to join the sections of the smokers.
- Barrels: You will need two barrels to make the chambers of the DIY offset smoker. You will need a big barrel, and the other should be a smaller one.
- A pipe: A pipe will help to make a chimney that will attach to one chamber as the door of the smoker.
- Wood or iron: You have to make the smoker’s body with wood or iron, whatever you want.
7 ways to make a DIY offset smoker
If you’re looking to up your barbecue game, learning how to build an offset smoker is a great place to start. In this blog post, we’ll go through the steps to make your own offset smoker.
1. Making a frame
As we have read above the frame is the most essential part of the smoker. The whole weight of the smoker lies on the frame. The frame should be as powerful as it can hold the chambers on it.
Now the thing is, which material should be used for the making of the frame? There is a choice between iron and wood. Whether you want to use wood or iron, the choice is yours.
If you select wood for the frame, there is a risk of quality. There might be chances that the wood cannot hold the weight of the smoker.
As we know the whole smoker is held by the frame, it should be made up strongly. For a powerful frame, you should choose iron.
Iron gives you a guarantee of hold. There is no chance of falling the smoker.
2. Building chambers
For making the chambers, you will need two barrels. You can use used barrels. There is no excuse for using used barrels, though it does not contain any harmful chemicals. You should clean the barrels thoroughly from the inside. After this, use the grinder for the cutting of the barrels.
Use the larger barrel for the cooking chambers and the smaller one for the firebox.
3. Making the vents on the chambers
The key to successful offset smoking is adequate ventilation, so you will need to create vents in both chambers. A rectangular hole can be cut in the side of the firebox and a steel door fitted with a valve. This allows you to control the amount of oxygen going into the firebox, and therefore, the temperature.
For the kitchen, you’ll need to blow two vents – one on the upper side and another on the lower side of the chamber. The lower vent should be larger and closer to the firebox, while the upper channel should be smaller and closer to the opposite end. This creates a draft that draws smoke and heat from the firebox into the kitchen, giving your meat a nice smoky flavor.
Once you have your vent installed, you can add a grate to the kitchen and a charcoal burner to the firebox. You can also add a chimney to the kitchen ceiling to help with ventilation.
4. Making the chimney
The most crucial part of an offset smoker is the chimney. This is in which the smoke and warmth are channeled into the meals chamber. To make a DIY chimney, you’ll want a 55-gallon drum, some metal pipes, and a few different materials. The first step is to cut the drum in 1/2 lengthwise. This may be the bottom of your chimney. Next, you may want to reduce a hole within the side of the drum for the steel pipes to match in. These pipes will serve as the vents for the fireplace chamber.
Once you have the base of your chimney, it is time to paint at the food chamber. You can use an old barrel or even a filing cabinet for this. Cut a hole in the facet of the meals chamber for the chimney to fit in. This will be where the smoke and heat input the meals chamber. You also can upload a grill grate inside the meals chamber on your meat to take a seat on.
Place the food chamber on elevation of the fireplace chamber and connect the chimney to the hole you narrow within the facet. You can use excessive-temperature silicone to seal any gaps among the two chambers. This will make sure that each one the smoke and warmth are directed into the meals chamber.
5. Joining the sections
Now when you are done with making all the parts, it’s time to join them together. To join all the sections, use a welder. If you know welding you can do it by yourself. But if you are unaware of the welding you can hire a weldor. This can make your task easy.
When you start welding, that the smaller barrel should be lower than the larger one. This setting helps the heat to travel all around the smoker.
Join the pipe at the chamber carefully.
6. Set a fire through all over the smoker
When you are done with the joining of sections, now is the time to make the smoker ready to cook.
Once the flames are arranged, carefully pour them into the firebox, ensuring to spread them out perkily. If you’re usage of wood shreds or chunks, you could upload them to the charcoal at this point. Close the firebox door and fix the dampers to limit the air flowing.
Now it’s time to place your meat in the smoking chamber. Be positive to keep the meat on the alternative side of the firebox. You also can use a pan of water within the kitchen to adjust the heat.
While your meat is cooking, it is vital to monitor the temperature of the smoker. The perfect smoking temperature is 225-250 ranges Fahrenheit. You can alter the dampers as needed to hold this temperature.
It is also necessary to occasionally add charcoal and plenty of charcoal or wood chips to keep the fire burning. You can do this by adding a few through the firebox door or using the side table if you have an offset smoker.
Once your meat has reached the desired internal temperature, it’s time for the smoker to rest before removing and serving. Be sure to close all dampers to extinguish the fire and cool down the smoker.
7. Clean the smoker properly
One of the most critical factors of maintaining your offset smoker – cleaning it nicely. As lots as all of us love indulging in delightful smoked meats, the aftermath of cleaning up can be a overwhelming. But fear no longer, with the proper tricks, cleaning your offset smoker can be a breeze.
A clean smoker not only guarantees that your food is secure to eat, but it additionally facilitates to preserve the excellent of your smoker. Built-up grease and residue can result in choppy heating and even rusting of your smoker, which can have an effect on the flavor of your meals and the lifespan of your smoker.
The first step is to let your smoker to calm down absolutely earlier than you begin cleaning. Once it has cooled down, eliminate all of the racks, grates, and different detachable elements. Soak them in hot, soapy water for at least half-hour to loosen any built-up grease and food particles.
If the racks and grates are wet, use a scraper or a stiff brush to remove large pieces of food or debris from your smoking. Be sure to get to all corners, including the firebox and chimney. Remove all debris and spray the smoker with a mixture of warm water and soap. You can also use a special stain remover for better results.
Remove residue with a scrub brush or steel wool. If you have stubborn stains, you can scrub the stains by using a mixture of baking soda and water as a paste. Let it sit for a few minutes before it can wash off.
After cleaning all the parts, rinse thoroughly with warm water and let air dry. Once everything is dry, you can reassemble your smoking and it’s ready for your next BBQ.
Final words
You discovered that becoming a DIY offset smoker is not as hard as we thought. You just need to remember some important guidelines. First, you need to establish your security. Never operate any equipment without safety gloves and safety glasses. This can keep you safe from any danger.
In short, the query of how to make an offset smoker has an easy solution. If ou want to learn about this topic, you can visit BBQ Smoker Pro.