When it comes to file synchronization services, the name of Google Drive is certainly not an unfamiliar one. There’s a good chance that you might’ve heard of it already. While Google is certainly not the only player in the world of online file storage and synchronization services, its offering is certainly a more useful one because of tighter integration with other popular Google products and services. Therefore, learning to use it makes sense. And that’s precisely why we created this guide – to help you learn Google Drive. Let’s get started with it:
Accessing
The first thing that you’ll need to use Google Drive is a Google Account. Most internet users have one, so we’re assuming that you’ve already got it. If you don’t have one, it’s time to create it because a Google Account keeps your data synchronized on multiple devices. Once you’ve created the account, sign in to drive.google.com and you’ll be ready to get started.
Navigating
Navigating Google Drive is not too difficult, thanks to the simple user interface it has been provided by Google. You can create any new document by clicking the big ‘New’ button in left hand side, and below it you’ll find the options to quickly locate any particular types of documents or files. For instance, the ‘Shared with me’ option shows you all the files which have been shared with you, ‘Google Photos’ option shows all your photos, ‘Recent’ option shows the files you opened recently, and so on.
There’s also a ‘Computers’ option that you can use to access files from your different computers, but in order to do so you’ll first of all have to install company’s Backup and Sync application on the computers that you want to Sync. Once you’ve done that, the folders you choose to keep synchronized on your various devices will be Synced to your Google drive, and this Computers option is where you’ll be able to see the contents of those folders.
And then there’re options of ‘Starred’ and ‘Trash’. Starred option is to access the files that you’ve starred (staring a file is a method of marking it as favorite in Google drive for easier access later). All starred files can be seen from the Starred option. And the Trash option is, well, pretty self-explanatory – it keeps a backup of files that you delete from your Google Drive.
Uploading files
Uploading files to Google Drive is also a very straightforward affair. You can either drag and drop any file that you want to upload in any of the Google Drive folders, or you can click the New button and select “File upload” or “Folder upload” depending on what you want to upload. Once you click the desired option, you can choose the file or folder from next dialogue box.
Creating documents
The documents in Google Drive are created by clicking the “New” button, as I said above. After clicking that button you’re shown the options of creating a Word document (by using the option Google Docs), a spreadsheet (Google Sheets), or a presentation (Google Slides). For each of these document types you’re also provided the options to create a blank document or create one from the templates.
Accessing documents offline
You can also access your Google Drive saved documents offline as long as you’ve the Google Docs Offline extension installed in your Chrome browser. Once you have this extension installed, you’ll have to enable it from your Drive settings. After doing both these things you’ll be able to access some of your documents even when being offline. However, keep in mind that only those documents which you’ve not shared with anyone will be available for offline viewing.
Sharing documents
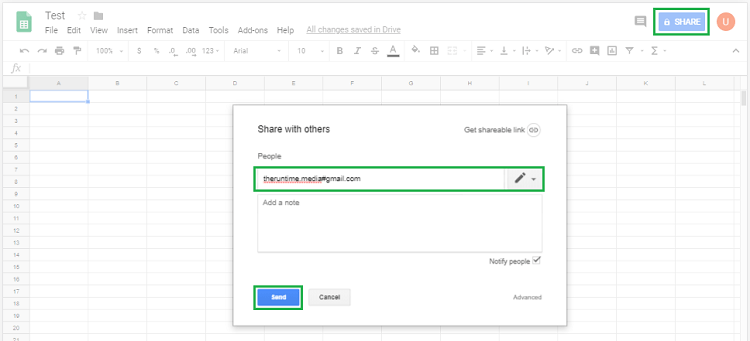
Sharing documents is also an easy affair in Google Drive. If you already have the document open, you can click the Blue ‘Share’ button in upper right corner. Otherwise if you’re on the Drive page, you can select the file(s) that you want to share and click on the Share icon shown in the image given below.
Once you click either the button or the icon you’ll be shown a dialogue box in which there will be a shareable link of the document. You can copy the link and send it to anyone so they can view it.
Collaborating with others
Just as you can share the documents with others so they can view them, you can also share them so others can edit them. If you want others to be able to edit a document or comment something about the document, just open the Share dialogue box by clicking ‘Share’ button or icon and enter the email address of that person in the ‘People’ section. After entering the email address just select the “Can edit” or “Can comment” option from the permissions menu shown below.
You can choose any of the 3 available options from that menu based on what permissions you want to provide to the person with whom you’re sharing your document. Once you’re done adding all the people, just click ‘Done’. The people you added here will receive a link in the email that they can use to edit or comment on the document.
Conclusion
So that’s how you can use Google Drive. In the future the scope of this SaaS platform is only going to increase as Google has much bigger plans for it. The company doesn’t want to keep it limited to a file synchronization service or an Office suite only. Instead, it’s also planning a number of other capabilities for the service. They include the ability to create drawings, 3D models, sketeches, and much more than that. Some of these features are already live, while some will go live in future. Therefore, it only makes sense for you to start using Google Drive as soon as possible. The sooner you get familiar with it, the easier it will be for you to use it in future. So get started with it today!