Creating a community in Salesforce is an excellent way to foster interaction and collaboration between customers, partners, and employees. It can help build relationships and trust, as well as provide valuable insights into customer feedback. Communities can range from simple forums or discussion boards to full-fledged social networks or marketplaces. Making client clients is somewhat unique to making inner Salesforce clients. Local area clients generally have a contact related with them. So to make a local area client, the initial step is to make a contact for the client. Feel free to make a contact. Add a First Name, Last name, Email and whatever other subtleties that check out.
In the event that you’re utilizing Salesforce People group, you can make a Salesforce People group coordination to give admittance to a Local area subset of the Salesforce occurrence and arrangement Local area clients as outside clients.
At the point when another Local area client is provisioned, Okta makes another contact in Salesforce related with the Salesforce account. This new contact contains the client’s name and email address. This contact is essential since Local area clients in Salesforce should be related with a contact.
5 Steps to Create a Community in Salesforce
In this tutorial, we’ll cover the basics of how to create and manage a Salesforce Community.
Step 1: Plan Your Community
The first step in creating a successful Salesforce Community is to plan it out ahead of time. Think about what type of activities you would like your members to be able to do within the community, such as discuss topics, ask questions, post ideas or solutions, etc.
It is also important to determine the purpose of your community. Are you looking to increase customer satisfaction by providing quick answers to their questions? Or, are you hoping to create a marketplace for customers to buy or sell products? Knowing this will help guide your decisions later on in the process.
Networks are marked spaces for your representatives, clients, and accomplices to interface. You can modify and make networks to meet your business needs, then, at that point, change flawlessly between them” (Salesforce).
Progresses in innovation and mechanization have brought about less human association in general. Yet again yet in the present tech-driven world, clients, representatives, and chiefs are hoping to interface on an individual level..
Clients need to construct nearer, entrust-based associations with the brands and items that they love. Representatives, particularly in a world that is turning out to be progressively determined by remote work, need to feel like they are essential for the group and associated with individuals that they work with on a more profound level. Chiefs and pioneers believe a way should draw in with their clients and representatives such that feels veritable and genuine.
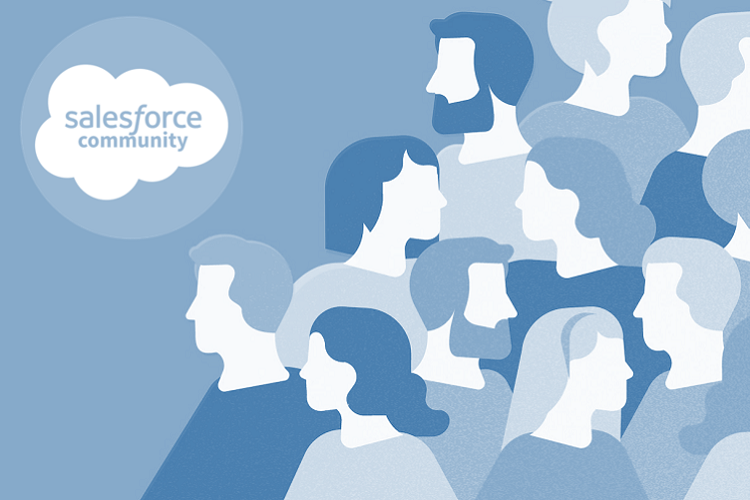
Salesforce is addressing this need through Salesforce People group. This stage gives an open gathering where clients and workers can share thoughts, make ideas, and talk about the items and enterprises. Accordingly, clients have better encounters and organizations can gather more input.
Step 2: Create Your Community
Once you have a plan in place, it’s time to create your Salesforce Community. This can be done through the Communities Builder, which is located in Setup under Administer > Manage Communities.
From there, you can choose between several different types of communities, such as Customer Service Communities and Partner Communities.
Once you select the type of community that best fits your needs, you will be prompted to fill out some basic information, such as the community name, URL, and language. To make a local area, select the name or make another one, compose a portrayal, and type in the URL. Then click “Make”. The people group has been made, which you can now distribute.
Step 3: Design Your Community
Now that your community is created, it’s time to start designing it. This includes choosing a template design, adding content and features (such as polls or forums), and organizing navigation menus.
You can also add custom branding by uploading logos or changing the color scheme of your community. Additionally, you can add Salesforce applications such as Chatter or Knowledge Base to further extend the functionality of your community.
Step 4: Manage Your Community
Once your community is up and running, it’s important to manage it on an ongoing basis. This includes monitoring activity, moderating content, and responding to customer inquiries.
You can also use Salesforce Community Cloud analytics to track important metrics such as engagement rates and user retention. This will help you identify trends and areas for improvement in your community.
The people group cloud administration gives a stage to keep up with correspondence between the workers, clients, and deals or colleagues. It likewise empowers clients to share information and pictures progressively.
It permits the associations to straightforwardly interface with the clients, improve accomplice achievement, and increment the worker’s efficiency. With this local area cloud, we can give customized insight to every client. The clients can track down networks to effectively determine their concerns or inquiries.
The People group Cloud can be called the gateway, assist gathering, support with siting, or the consequences will be severe.
It is a better approach to interface clients, representatives, and accomplices to share the data and team up on the business processes. It helps every one of them by giving them the necessary information and records to proficiently finish their work.
The Salesforce people group cloud is much more adaptable to be fitted with any business interest.
Step 5: Monitor Performance
The last step is to regularly monitor the performance of your community. This includes monitoring activities such as page views, response times, customer satisfaction scores, and more.
By tracking these metrics, you can see how successful your community is and make changes accordingly. Additionally, you can use this data to inform any future decisions or improvements that need to be made in order to keep your community thriving.
Salesforce People group Cloud is an internet-based stage that forms marked online interfaces for the responsive customer, worker, and accomplice commitment. It is essentially a system for organizations to rapidly make marked entryways that can be upgraded and modified for portable.
FAQs:
Q: What types of communities can I create in Salesforce?
A: You can create Customer Service Communities, Partner Communities, and other custom communities in Salesforce.
Salesforce People group Cloud utilizes a social CRM stage for screen sharing and visiting. It empowers its clients to trade pictures and information continuously during a continuous discussion.
The stages make client relationship the executives (CRM) simpler and permit clients to search for data as well as speak with individual clients. The control center likewise includes a Purchase button subsequently working with web based business.
Representatives can utilize the local area cloud for various types of working environment collaborations like human asset the executives (HRM), investigating, help work area correspondence, and cooperation among groups in a different topographical region.
In like manner, the administration can utilize it to further develop correspondence with its channel accomplices and other outer gatherings.
Q: How do I customize my community?
A: You can upload logos and customize the color scheme to add your own branding to the community. Additionally, you can add Salesforce applications such as Chatter or Knowledge Base to extend its functionality.
Networks are marked spaces used to associate with your representatives, accomplices, or clients. They can be utilized to drive more deals and convey elite support of your clients by making where they can find the required solutions, oversee social substance, commitment, and work process across the board place. It truly assists with monitoring specific tips and deceives prior to setting up your local area and redoing it. The following are a couple of them which are consistently on our agenda:
Q: How do I track metrics for my Salesforce Community?
A: You can use Community Cloud analytics to monitor engagement rates, user retention, page views, response times, customer satisfaction scores, and more. This will help you identify trends and areas for improvement in your community.
A standard page that depends on a clear design or a preconfigured page if accessible, click Standard Page. If you don’t have preconfigured pages, pick a clear format. On the other hand, in the event that you really do have preconfigured pages (since you’ve sent out or imported custom pages, pick one to tweak or snap New Clear Page to choose a clear format. Click Straightaway, give the page an exceptional name, and determine the static piece of the page’s URL. A detail, a rundown, and a connected rundown page related with one of your Salesforce objects click Item Pages in Client care as it were. Select your desired item to connect with the page.
Conclusion
Creating a Successful Community in Salesforce is an excellent way to foster interaction and collaboration between customers, partners, and employees. It can help build relationships and trust, as well as provide valuable insights into customer feedback. By following the steps outlined in this tutorial, you can create a successful Salesforce Community that is tailored to your specific needs.
The key to success with any community is setting up the right processes for managing it. As such, don’t forget to set aside time each week or month devoted to monitoring the performance of your community and making any necessary changes. With a little bit of effort, you’ll soon have a thriving community in Salesforce!